How To Set Up For Zoom & Online Guitar Lessons
Introduction
If you’re learning guitar online via a video call, then there are a few aspects you can implement to make the most our of your lessons. These aspects will vary slightly depending on what device and platform you’re using.
Platform
Whilst we can run online guitar lessons via any video calling platform, we’ve found the best to be Zoom and Google Meet.
FaceTime also serves as a good backup platform, just in case you have technical difficulties. It’s wise to have multiple platforms ready to go, just in case.
Device
The best setup for an online lesson is definitely an actual computer, whether it be a laptop or desktop. But even better than that is to use two monitors (screens). This way, you can have the video call open on one screen, and your student Google Document open in the other. If you don’t have dual screens, you can still have both of these open in the same window.
Alternatively, an iPad or iPhone will suffice if that’s all you have.
If you happen to have multiple devices, you could have the video call on one (eg iPhone) and the document open on another (eg. iPad). This will also use more internet bandwidth. But your teacher can always screen share the document if needed.
Setup
• VISIBILITY
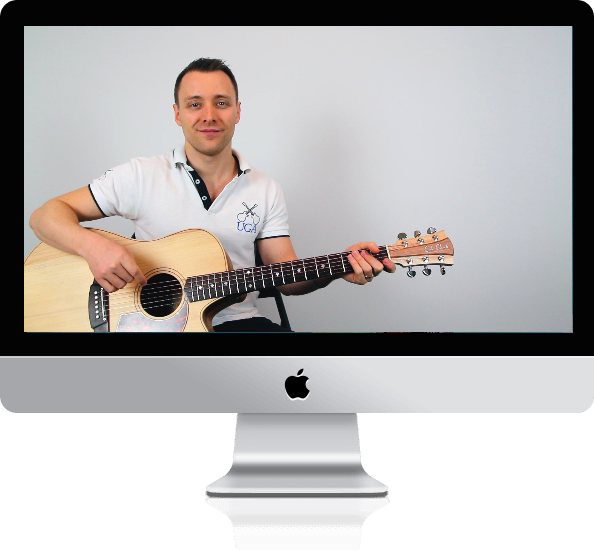
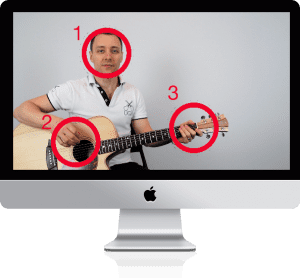
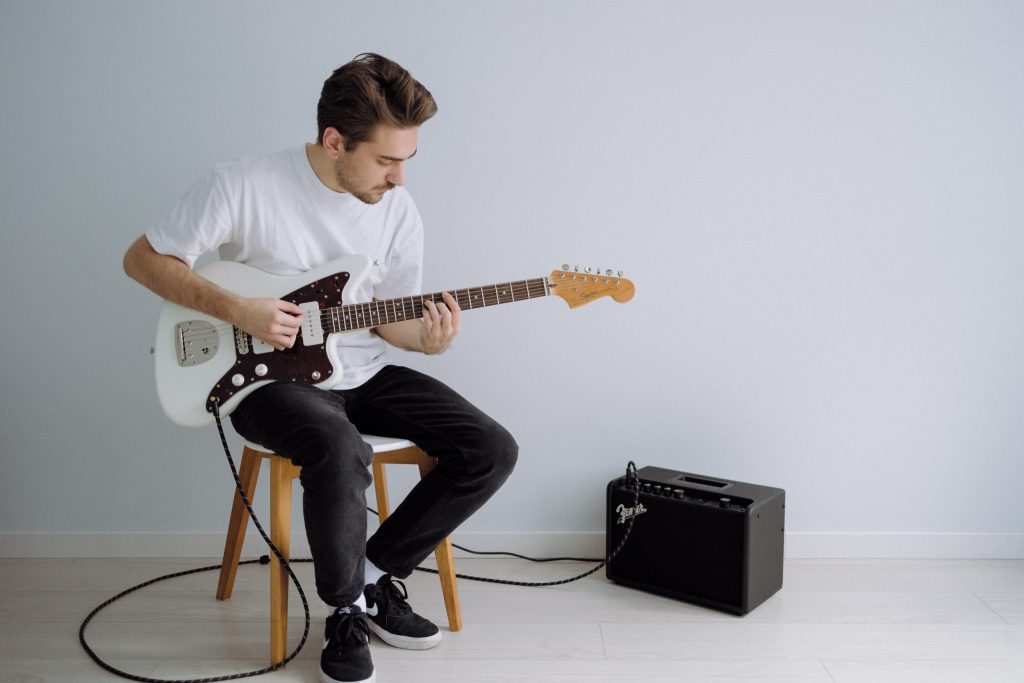
Whilst we are able to run the lesson without any video feed whatsoever, it’s ideal if we can see:
- Face
- Picking hand
- Fretting hand
The main priority would be your picking and fretting hands, so don’t stress if you’re too shy to show your face. We’ve had students who have kept their camera off for years – and they still played great. We just relied on the sound to teach them.
• AUDIBILITY
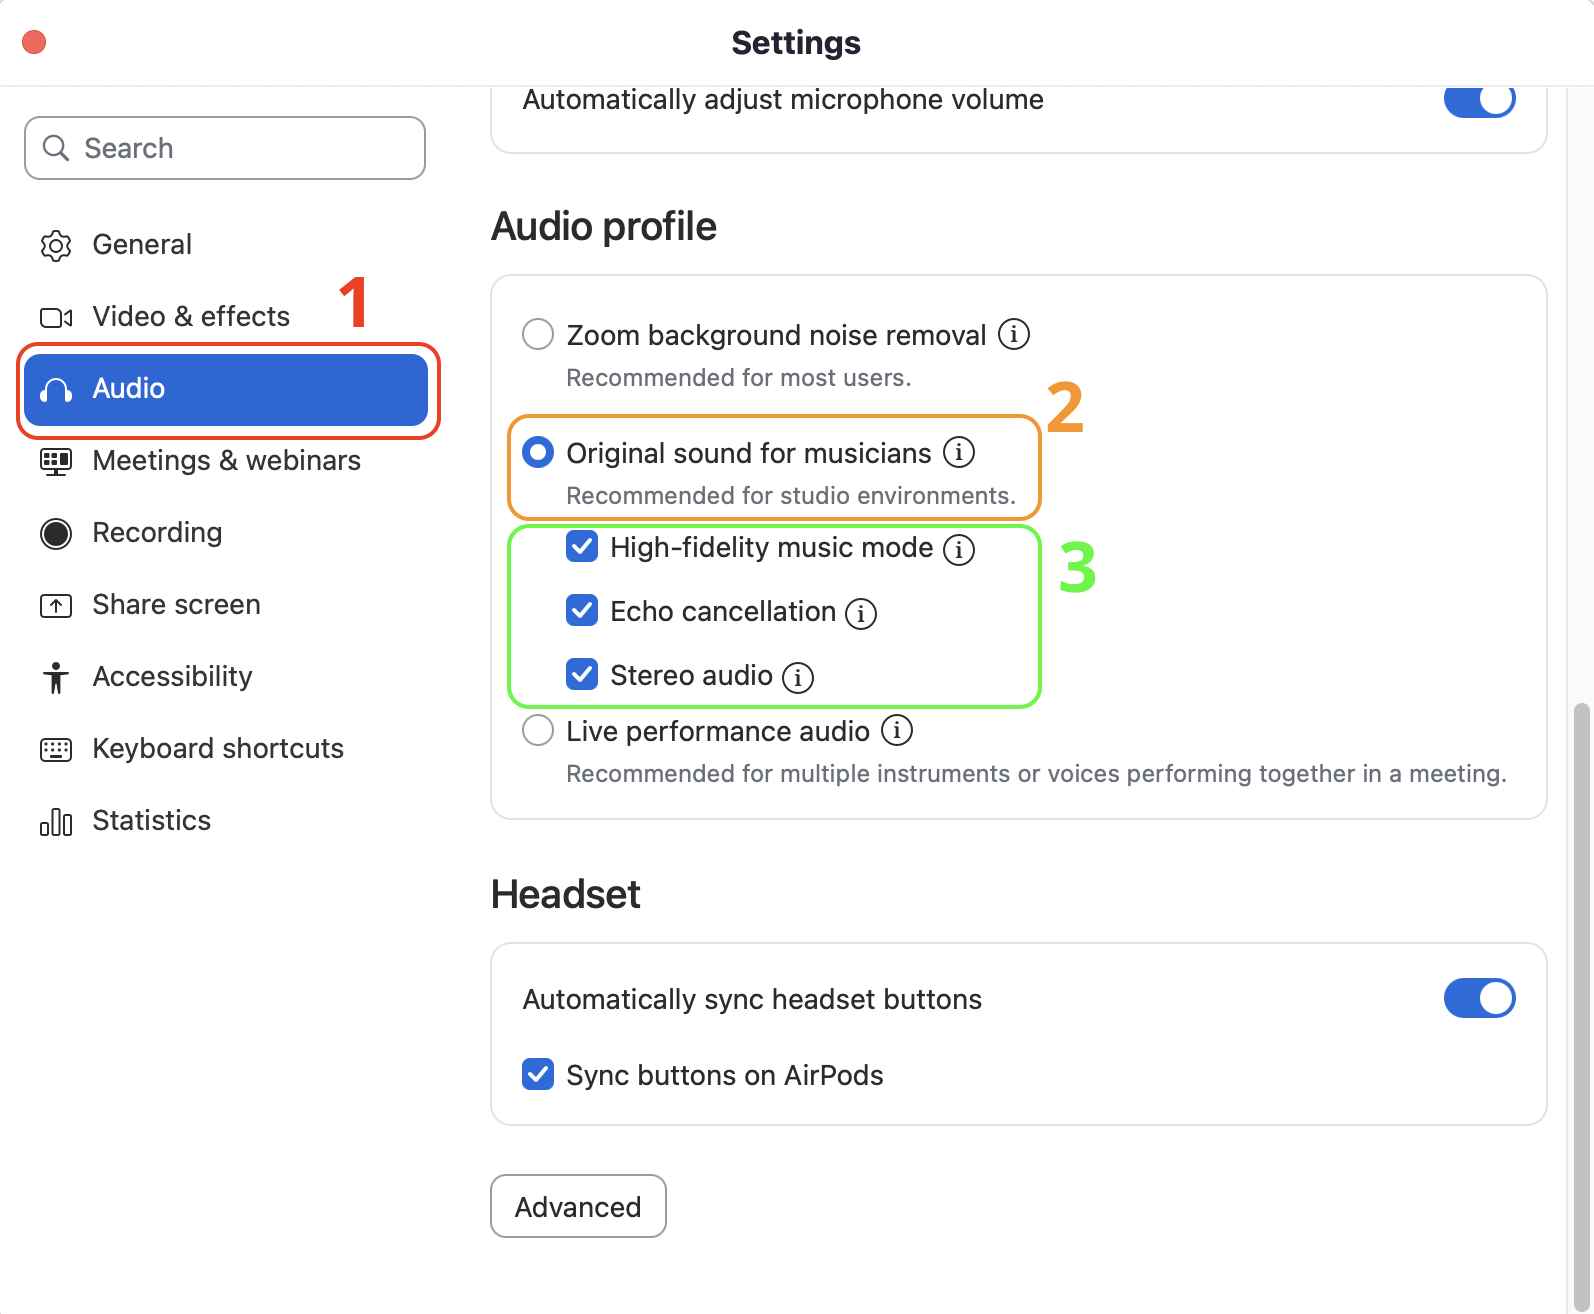
Even though we can run the lesson with minimal audio, it’s best if we can clearly hear your guitar. For this reason, you should turn off background noise suppression. This process will differ depending on your video calling platform, but the below picture illustrates how to do so on Zoom.
- After opening Zoom’s settings, click on “Audio”
- Under the “Audio Profile” heading, select “Original sound for musicians”
- Several other options will appear – it’s best to select “Echo cancellation”, and also the other settings if your internet connection is strong enough. If not, leave them unselected.
- In your Zoom call window, a new button will appear saying “Original Sound For Musicians”. Select this option to allow the full sound to pass through the call (effectively eliminating the noise suppression).
Please note:
- This process simply makes available the ability to turn “Original Sound” on or off, by an option that appears on the Zoom call window.
- This option may not be available on all devices such as iPad and iPhone versions of Zoom.
- The process to turn it on may vary depending on device.
Best Practices
Even if you have the right platform and device, there are still a few things you can do every week to make the most of your lessons:
- Be signed in and ready to start 5 minutes before your scheduled lesson time.
- Have your Google Document open on your computer, or a second device.
- Make sure the camera captures your face, strumming hand and your fretting hand. You may need to adjust the camera or your chair to do this. Sitting further back from the camera may also help.
- Be tuned and ready to go before your scheduled lesson time. Learn how to tune here.
Having Trouble?
Use the button below to get in touch with us and let us know how we can help you!

Responses